본문은 야곰 아카데미 커리어 스타터 캠프를 통해 학습한 내용을 회고한 글입니다.

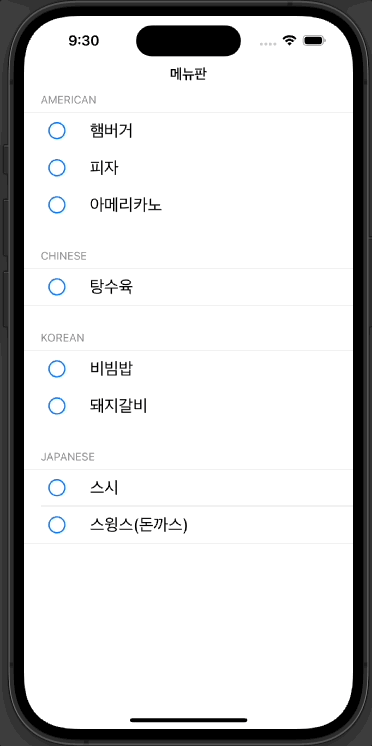
다음과 같은 화면을 만들어야했다.
그러기 위해서 우선적으로 테이블 뷰를 생성해줬다.
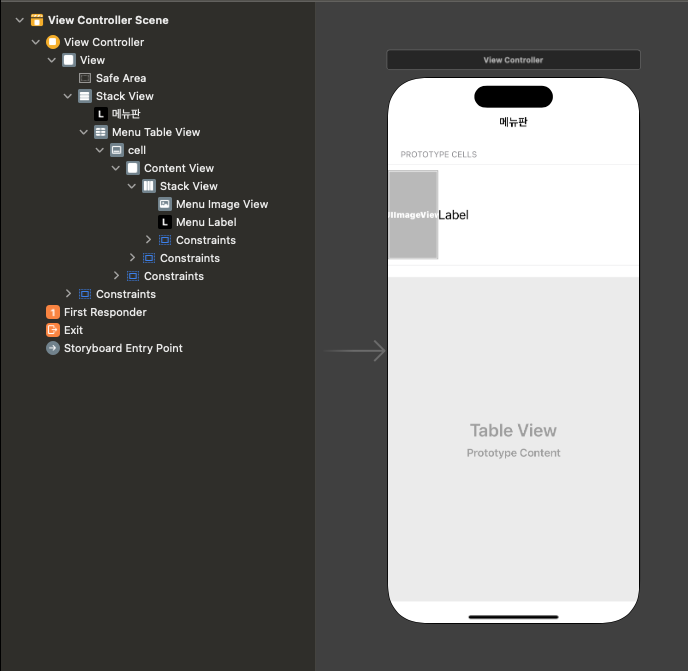
테이블뷰를 생성하고 그 안에 cell을 넣어줬다. 그리고 그 cell 안에 ImageView와 Label을 넣어줬다.
그리고 다음과 같이 만들어줬다:
enum FoodType: String, CaseIterable {
    case American
    case Chinese
    case Korean
    case Japanese
}

struct Food {
    let name: String
    var price: Int
}
배열처럼 사용하기 위해서 CaseIterable을 적용해줬다.
var menu: [FoodType: [Food]] = [
    .American: [
        Food(name: "햄버거", price: 5000),
        Food(name: "피자", price: 18000),
        Food(name: "아메리카노", price: 41000)
    ],
    .Chinese: [
        Food(name: "탕수육", price: 18000)
    ],
    .Korean: [
        Food(name: "비빔밥", price: 8000),
        Food(name: "돼지갈비", price: 20000)
    ],
    .Japanese: [
        Food(name: "스시", price: 20000),
        Food(name: "스윙스(돈까스)", price: 5000)
    ]
]
그리고 이를 적용하기 위해서 다음과 같이 ViewController를 구성했다:
class CustomTableViewCell: UITableViewCell {

    @IBOutlet weak var menuImageView: UIImageView!
    @IBOutlet weak var menuLabel: UILabel!

    func configure(section: Int, row: Int) {
        menuImageView?.image = UIImage(systemName: "circle")
        menuLabel?.text = menu[FoodType.allCases[section]]?[row].name
    }
}
FoodType에 allCases를 적용해서 배열의 형태로 만들고, 각각의 section에 해당하는 FoodType을 찾아냈다. 그리고 그 FoodType은 menu라는 딕셔너리의 키값이기 때문에 대괄호를 통해 Food로 이루어진 배열에 접근할 수 있었다. 그리고 row를 통해서 배열의 순서에 맞는 음식을 찾을 수 있었다.
'YAGOM CAREER STARTER' 카테고리의 다른 글
| [TIL] 20230228: Convention, weak-strong (0) | 2023.03.01 |
|---|---|
| [TIL] 20230227: instantiateViewController (0) | 2023.02.28 |
| [TIL] 20230224: Initializer (0) | 2023.02.24 |
| [TIL] 20230223: TableView 코드로 구현하기 (0) | 2023.02.24 |
| [TIL] 20230220: JSON (0) | 2023.02.21 |


